Winter camping isn't about enduring misery. It's about unlocking a silent, pristine world most people never see. The crunch of snow underfoot, the crystal-clear air, the absence of bugs and crowds—it's magical. But that magic hinges on preparation. A single oversight, like wearing cotton socks or underestimating your sleeping pad, can turn an adventure into a survival situation. After over a decade of camping in temperatures down to -20°F (-29°C), I've learned the hard way so you don't have to. This guide skips the generic advice and dives into the specific, often overlooked details that separate a comfortable winter camper from a cold, miserable one.
What You'll Find in This Guide
The Gear Non-Negotiables: Beyond the Basics
Forget your summer kit. Winter demands a specialized arsenal. The biggest mistake beginners make is thinking their three-season gear is "good enough" with an extra sweater. It's not. Here’s where to invest.
Your Sleep System: The Holy Trinity
This is your lifeline. A good system has three parts, and failing at any one ruins the other two.
The Sleeping Bag: Look for a temperature rating at least 10°F (6°C) lower than the coldest temperature you expect. A 20°F (-7°C) bag for a 20°F night is a recipe for shivering. I prefer a mummy bag with a draft collar. Down is warmer for its weight but useless when wet; synthetic fills are bulkier but retain warmth when damp—a key consideration in snowy, humid conditions.
The Sleeping Pad: This is the most critical and most overlooked piece. Your bag's loft is compressed underneath you, so insulation from the frozen ground comes entirely from your pad. You need an R-value. For winter, aim for an R-value of 5.0 or higher. Many use two pads: a closed-cell foam pad (R-value ~2) for durability and moisture protection, topped with an inflatable insulated pad (R-value ~4+).
| Pad Type | Typical R-Value | Winter Suitability | Pro Tip |
|---|---|---|---|
| Basic Foam Pad | 1.5 - 2.5 | Insufficient alone | Use as a protective, moisture-proof base layer under an inflatable pad. |
| Self-Inflating (3-season) | 3.0 - 4.5 | Marginal for deep cold | >Check the spec sheet. Many "all-season" pads hover at R-3.5, which isn't true winter rating. |
| Insulated Air Pad (Winter) | 5.0 - 8.0+ | Excellent | Brands like Therm-a-Rest NeoAir XTherm (R-6.9) are designed for this. Inflate it inside your tent to avoid moisture from your breath freezing the valve. |
| Double Pad System | 6.0+ (combined) | Gold Standard | Foam pad + winter air pad. Reduces risk if the air pad fails and provides extra insurance. |
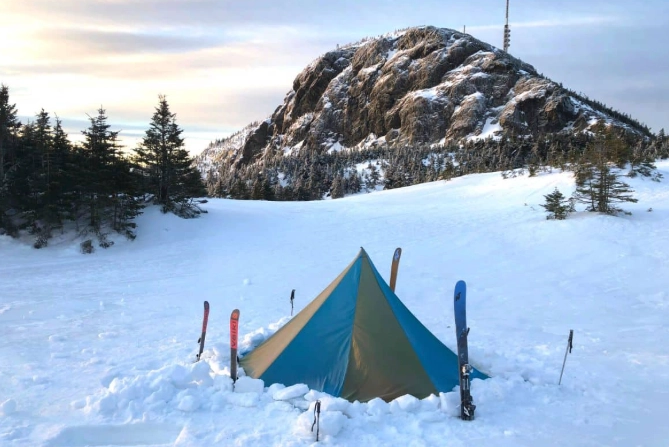
The Shelter: A four-season tent is heavier but designed to handle snow load and fierce winds without collapsing or flapping incessantly. A key feature is minimal mesh panels. If you're on a budget in a wooded, calm area, a sturdy three-season tent might suffice, but you must actively brush off snow accumulation through the night.
Clothing and Footwear: The Layering Foundation
Cotton is rotten. It absorbs moisture and loses all insulating ability. Your entire clothing system, from underwear out, must be synthetic (like polyester) or wool (merino is fantastic).
Boots need to be insulated, waterproof, and roomy enough to wear a thick wool sock without cutting off circulation. Tight boots = cold feet. Pair them with a vapor barrier liner (a simple bread bag works) between sock layers on extremely cold nights to prevent sweat from dampening your insulation—a game-changer few talk about.
A Personal Lesson: On an early trip, I wore my trusted summer hiking boots with two wool socks. My feet were blocks of ice by midnight. The boots were too tight with the extra socks, restricting blood flow. The next day, I bought a pair a size larger. The difference was night and day. Fit is everything.
How to Stay Warm: The Science of Layering and Heat
Staying warm is an active process, not a passive state. You manage heat and moisture from the inside out.
Mastering the Layering System
Base Layer: Moisture-wicking. Merino wool or synthetic. This layer moves sweat away from your skin. Avoid any cotton blends.
Mid Layer(s): Insulation. Fleece jackets, down vests, or synthetic insulated jackets. This is your adjustable thermostat. Have multiple weights.
Outer Layer (Shell): Wind and waterproof protection. A breathable hardshell stops the wind from stealing your warmth and keeps snow from melting into your mid-layers.
The trick is to adjust before you get cold or sweaty. Start a hike slightly cool, and add a layer the moment you stop moving.
Camp Heat Hacks
Once in camp, your metabolism is your primary heater.
Eat and Drink Constantly: Your body burns calories to generate heat. Eat high-fat, high-calorie snacks before bed. A swig of olive oil isn't glamorous, but it works. Dehydration impairs circulation, making you colder. Drink water even if you don't feel thirsty. Use an insulated bottle cover and store your water bottle upside down (the lid freezes first).
The Bedtime Ritual: Do 10-15 minutes of light exercise in your tent (jumping jacks, sit-ups) to warm your core before sliding into your bag. Fill a leak-proof Nalgene bottle with hot (not boiling) water and put it in your sleeping bag. It's like a personal heater for 6-8 hours. Change into dry, dedicated sleeping clothes—never sleep in the clothes you wore during the day, as they hold moisture.
Winter Camp Safety and Smart Camp Setup
Safety protocols are more critical in winter because mistakes compound quickly and help is far away.
Choosing and Preparing Your Site
Avoid valleys and depressions where cold air settles—these are "cold sinks." Look for a flat, sheltered spot with tree cover if possible, which acts as a windbreak. If there's deep snow, you'll need to pack it down with your snowshoes or skis and let it sinter (set) for an hour before pitching your tent. This creates a solid platform.
Always check the avalanche forecast for your area, even if you're not in obvious terrain. Resources like the US Forest Service National Avalanche Center provide crucial safety information. Never camp on or below slopes steeper than 30 degrees if avalanche risk exists.
Essential Safety Gear and Knowledge
Your pack should always carry:
- A reliable, redundant fire-starting method (lighter, stormproof matches, ferro rod).
- A detailed topographic map and compass (GPS batteries die fast in the cold).
- A headlamp with extra batteries (stored in an inner pocket to keep them warm).
- A small shovel for digging out your tent or building a windbreak.
- A fully charged power bank and a communication device (satellite messenger like a Garmin inReach is ideal).
Tell someone your detailed itinerary and expected return time. Weather changes fast; have a turn-back time and stick to it.
Expert Answers to Your Winter Camping Questions
Can I use a regular summer sleeping bag for winter camping if I wear all my clothes inside it?
This is a common and dangerous misconception. Wearing bulky clothes, especially damp ones, inside your bag can actually compress the bag's loft (the insulating air pockets), reducing its efficiency. A summer bag lacks the design, fill power, and draft tubes to handle sub-freezing temperatures. You'll likely spend the night cold, and you risk hypothermia. Invest in a properly rated winter bag. It's the one piece of gear you should never cheap out on.
What's the single biggest mistake you see first-time winter campers make?
Ignoring moisture management. They sweat in their clothes during setup, then get chilled. They breathe inside their sleeping bag, coating the interior with frost that later melts. They cook in the tent vestibule without proper ventilation, causing condensation to rain down on them. Every action produces moisture. Your goal is to vent it out. Always crack a tent vent, use the stove outside if possible, and change into dry layers the moment you stop generating body heat.
How do you handle going to the bathroom in the middle of a freezing night?
It's a hassle, but holding it will make you colder as your body expends energy to keep urine warm. Have a dedicated wide-mouth bottle (clearly marked!) for men. For everyone, keep your headlamp, camp shoes (like down booties), and a puffy jacket right by the door. Get out, do your business quickly, and get back in. The brief exposure is better than a long, cold night trying to ignore nature. For solid waste, dig a cathole in the snow down to soil if possible, or follow strict Leave No Trace principles for snow environments.
Is a tent with a lot of mesh bad for winter?
Not inherently bad, but less efficient. Mesh promotes ventilation, which is good for reducing condensation. However, it allows cold air to circulate more freely. Many three-season tents are mostly mesh. In winter, you want a tent with solid fabric panels for most of the body, with smaller, adjustable vents at the top (warm, moist air rises). If you're using a mesh-heavy tent, you'll lose heat faster and need a more robust sleep system to compensate.